Welcome to the second article in Glue Architecture’s exploration of Functions as a Service (FaaS). If you’re just joining us, feel free to give the first article in the series a quick perusal – while not strictly necessary, it’ll give you a bit of a background into the FaaS, their use cases, and why they may (or may not) be appropriate for your organization’s solutions.
The purpose of this article is to give the reader some hands on experience with Cloud provided serverless functions by way of AWS Lambda. This is a tutorial on setting up a Lambda function that is a bit more detailed than their simple “Hello World” example. While that tutorial is a great starting point to familiarize yourself with the tool – it’s a bit too simple to highlighting the challenges of adapting that technology to more advanced use cases.
This article instead goes one step beyond Amazon’s Image Resizing FaaS tutorial, and will teach you how to implement a basic signal analysis service utilizing Python 3.7, Numpy, and Scipy to read a file of EEG Data in European Data Format (EDF) uploaded to an S3 bucket, perform a Welch’s power analysis on each channel in the file, and write out the strongest frequency component of each channel to a JSON file in a different S3 bucket.
To be upfront – this tutorial is a fairly deep dive. During the process of this tutorial, you’ll not only gain exposure to AWS Services through getting hands on with S3, IAM, EC2, and Lambda, but you’ll also get a chance to dive into utilizing AWS via a Linux command line interface to assemble a custom Lambda package for deployment.
Mise En Place
Before beginning this tutorial, we advise you to have a few things in their place to make the experience as smooth as possible.
- Have an AWS Free Tier account set up for yourself
- Download an example EDF File
- Unzip this archive and set aside the file: ma0844az_1-1+.edf
- IMPORTANT: rename this file to ma0844az.edf so S3 will play nicely with it.
- Have a link to the Python Handler code handy
- Have logged into the AWS Console
Prepare the Infrastructure
Simple Storage Service (S3)
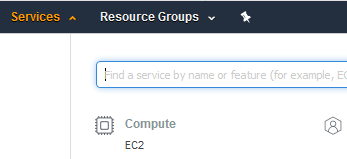
To begin, we’ll set up the locations where we’ll be looking for data to perform signal analysis upon, and where our reports will be written to. Start by navigating from the AWS Console to the S3 service. You can get to every AWS service efficiently by typing the desired service’s name in the Console search bar, as illustrated below.
From here, click on the “Create Bucket” button to be presented with the dialog box below.
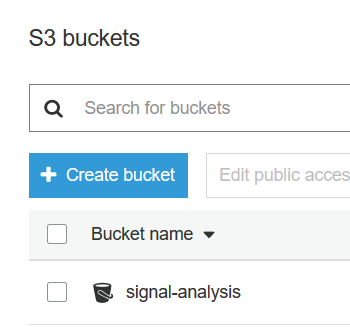
S3 bucket names must be unique, comply with DNS naming conventions, and not contain upper case characters or underscores. If “signal-analysis” is already taken – add a little something special to make your bucket your own. Pick the Region that’s nearest to you – as Glue Architectures is located the lovely Pacific Northwest, we went with US West (Oregon). For the purposes of this tutorial, you won’t need any special configuration considerations for this Bucket, so go ahead and make the bucket now.
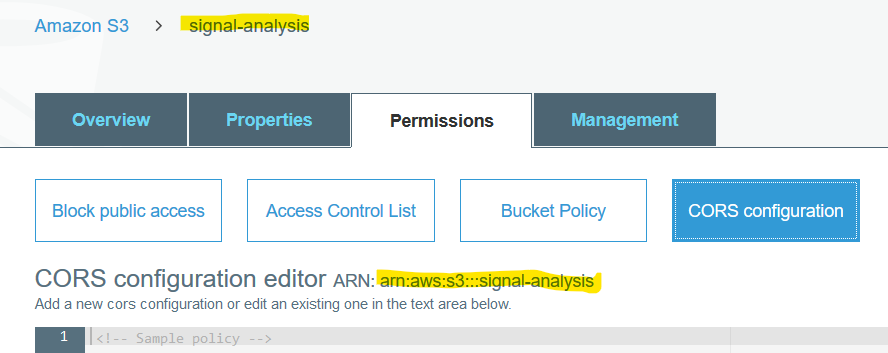
Once this bucket has been created, we need to take two more steps. First, we need to take note of two pieces of information about your S3 bucket. First, the name you chose for your bucket. The second is the Amazon Resource Name (ARN), which can be found from the permissions tab of an S3 bucket. Both these pieces of information are highlighted in the image below.
Next – we need to seed our S3 bucket with the test data. Click on the bucket you just created to open it up, and reveal the option to upload files to it. Once you’ve clicked on “Upload” – select the option to upload a file from your computer and select the “ma0844az.edf” file we downloaded earlier, and select the option to upload it immediately.
As a reminder – it is important that you’ve renamed the test file away from its default name. When reading files from S3, Lambda will replace the `_` and `+` characters with spaces, which will result in the Lambda code package you’ll upload later having difficulties loading the file to process.
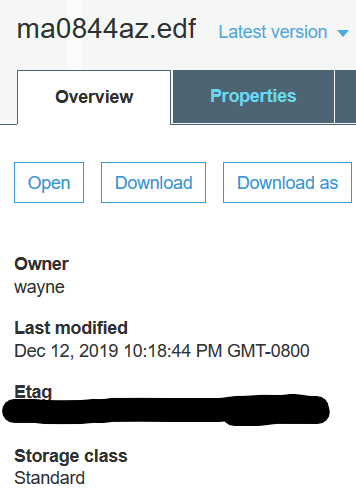
Once the file has been uploaded, you’ll also want to take now of the Etag value for the file you uploaded. This can be found by clicking on the file from within your bucket after its been uploaded, and it will be listed on the file’s overview page.
Identity Access Management (IAM)
Once you’re finished with S3, the next critical setup component that we’ll need to set up is an IAM role that will allow our Lambda function to call AWS services on our behalf. The role we’ll set up for this tutorial isn’t necessarily what you would want for a public facing resource, but will be sufficient for this tutorial.
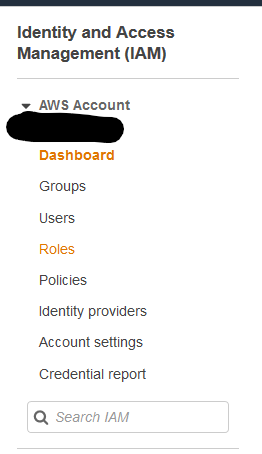
Begin by navigating to the IAM service in the same way you navigated to the S3 service in the previous step. Once there, select Roles from the left pane. In the controls that appear on the right hand side of the screen, click on the large blue Create role button.
Creating an IAM role consists of four steps:
- Selecting a Trusted Entity
- Attach Permission Policies
- Add Tags
- Review the new Policy
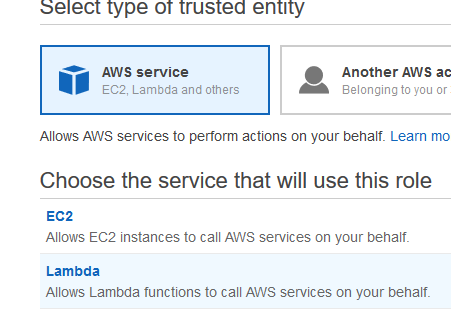
These steps are laid out in the images below. For this tutorial we’ll want to select AWS Service as our trusted entity, and select Lambda as the specific service to be trusted. Once the trusted entity is established, we need to select the Permission Policies to assign to the Role that we are created.
For this exercise, the AWSLambdaExecute policy already exists, and is tailor made for our purposes. This policy grants the Role we’re created the limited permissions to List, Read, and Write CloudWatch Logs, and to Read and Write to and from specified S3 buckets.
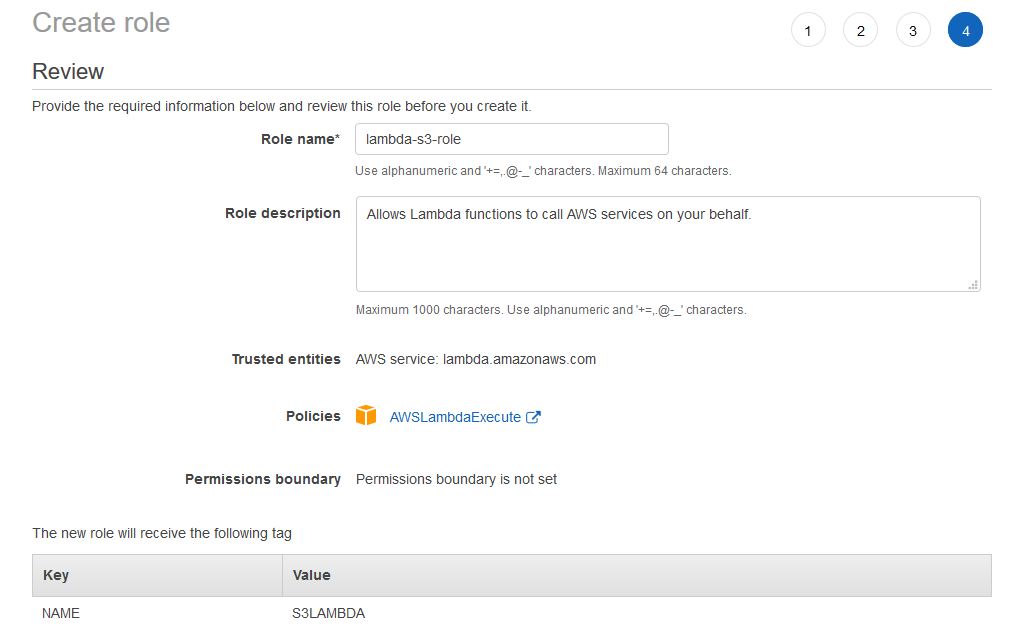
You have the option to add a variety of tags to your Role (I’ve assigned a Name to mine) to highlight additional metadata for the Role. Finally, when you review the role, you will assign it a name and an optional description, which are illustrated below.
Name it something easy for you to remember, such as “lambda-s3-role” – though you’ll need to add a little something to yours. Once you’ve created the role, you’ll need to retrieve the ARN (Amazon Resource Name) which will be used to identify the role you’ve created across other Amazon services. You can find this by navigating to the “Roles” page of the IAM service, and clicking on the specific role you just created. The result should be similar to the image below.
Create an IAM Role for your EC2 Instance
As we’ll be using the AWS CLI to deploy our function content to Lambda from an EC2 instance for the purposes of this tutorial. The best practice for utilizing AWS CLI via an EC2 instance is to create an EC2 instance IAM Role that you’ll give to the instance you create later on.
This is considered the best practice by AWS, as it will prevent the account credentials one normally configures the AWS CLI with from leaking, should an EC2 instance become compromised. Instead, you can simply remove the role from a compromised EC2 instance, or remove the role entirely to manage a compromise.
Begin by creating a role as above, only this time, we’ll be selecting “EC2” rather than “Lambda” as our trusted service.
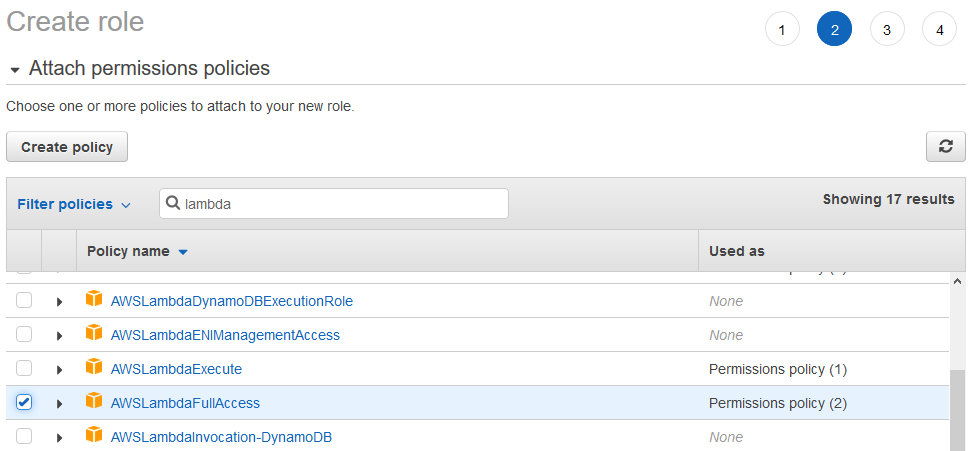
In terms of permissions, for this role, you’ll want to search for “AWSLambdaFullAccess” to give your EC2 instance all the permissions it will need to upload and manipulate Lambda Function packages. If you’d like to access the contents of your S3 buckets to review results, you may also want to add “S3ReadOnlyAccess” to the role.
Build the Function Package
With the infrastructure taken care of, we can dig into the meat of the tutorial. Where this exercise gets interesting for us is that to accomplish our aims, we won’t be able to rely on the Lambda console interface to build our function. Instead, we’ll need to assemble it from the command line and create a Zip package to deploy out onto Lambda.
To ensure everything you build plays nicely with the Lambda environment, for this tutorial – we’re going to need an EC2 instance. Start by navigating to the EC2 instance as you have navigated to all the other services in the tutorial thus far.
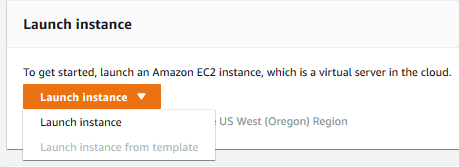
Once there, you’ll start by launching a new instance.
The choice of AMI you make when spinning up your EC2 node is important, as you want the code that you build and test on your EC2 node to also run within Lambda. At the time this tutorial was written, the Amazon Linux 2 AMI is essentially identical to Lambda’s environment. If it builds on this AMI, it’ll probably run on Lambda. An additional benefit is that it is Free Tier Eligible.

Choose to spin up this AMI on a t2.micro instance, which is both free tier eligible and with more than enough power to deploy code to Lambda.
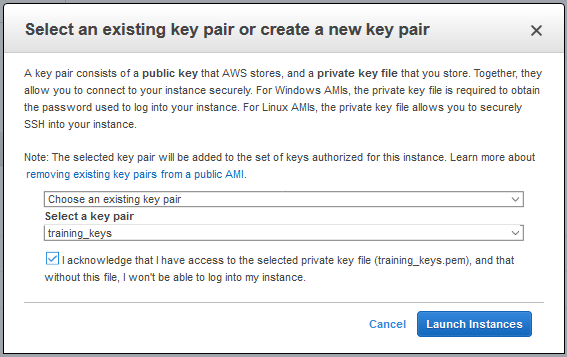
We don’t need any more configuration than that, so go ahead and click on the blue “Review and Launch” button at the bottom of the screen to be brought to a summary of your instance. Review, and click launch to be presented with a dialog asking you to either create a new key pair, or to select an existing one.
If you are creating a new keypair for this instance – make sure to hold onto the keypair. This will be your only chance to download it – and it will be the only way you can access your instance.
Once you’ve created your instance, make sure to copy down the public DNS it is running on. You’ll use this address to log into your instance via SSH.
Attach your EC2 IAM Role to your New Instance
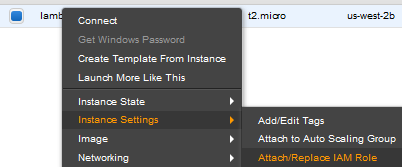
Once your EC2 has been created, you will want to right click on your instance name. From the “Instance Settings” submenu, select “Attach/Replace IAM Role”.
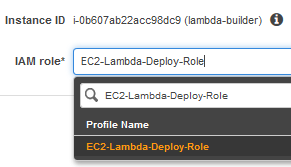
The dropdown on the next screen will be automatically populated with the role you created in the previous step. Select that, and click the “Apply” button. With this IAM Role applied to your EC2 instance, you’ll be able to utilize the AWS CLI directly from an EC2 instance without exposing your AWS Security Credentials to the wider world.
Log into your Instance
For this tutorial, we’ll assume that you’re utilizing a modern operating system, all of which should have access to SSH in some form. You can access SSH through a standard terminal on Linux, Mac OSX, or Windows Subsystem for Linux, and through Powershell on Windows 10.
Regardless of platform, the command you’ll need to log into your instance is:
ssh -i <the path to yourkeys> ec2-user@<the public DNS you copied above>
Answer yes when SSH asks you if you’re sure you want to continue connecting to this server. Upon success, you should be greeted with the default Amazon Linux 2 AMI Message of the Date and a Bash prompt.
Basic Preparation of your Instance
Once you’ve logged into the instance, the next steps to take to prepare your installation package are straight forward.
-
sudo yum update -y
- If you’re working from a fresh EC2 instance – this will make sure it’s up to date with all the latest security updates.
-
sudo yum install python3 python3-devel
- This is a Python based FaaS, so we’re going to need a Python build environment
-
sudo pip install virtualenv
- Installs the virtualenv tools globally for your install of Python
-
mkdir signal-analysis
-
virtualenv ./signal-analysis
-
source ./signal-analysis/bin/activate
- Steps 4-6 serve to get us into a virtual environment
-
pip install numpy scipy pyedflib
- These three packages are required by our tutorial exercise, but won’t be provided by Lambda’s Python runtime.
-
cd site-packages/
-
zip -r ~/SignalAnalysis.zip .
- This packages the full contents of the dependencies of the virtual environment you’ve built into a zip file in your home directory for deployment to Lambda. Don’t be surprised to see this zip package weigh in at 50 – 60 MB.
-
cd ~
Download and Add the Lambda Function Code
wget <link to python script>
We recommend you take a moment here and get to know the function you’re about to deploy. The full code can be read over on the Glue Architectures GitHub page, but we wanted to call out a few of the interesting aspects of S3 interaction with the handler function here.
def handler(event, context):
  """
  Standard S3 Handler Method for AWS Lambda
  with some modifications for the Glue Architectures
  AWS Lambda Tutorial

  Source: https://docs.aws.amazon.com/lambda/latest/dg/with-s3-example-deployment-pkg.html#with-s3-example-deployment-pkg-python
  """

  for record in event['Records']:
    bucket = record['s3']['bucket']['name']
    key = unquote_plus(record['s3']['object']['key'])
    # Generate a random UUID for a tmp dir to store the EDF file
    edf_path = '/tmp/{}{}'.format(uuid.uuid4(), key)
    report_path = '/tmp/{}-report'.format(key)
    s3_client.download_file(bucket, key, edf_path)
    edf_analysis(key, edf_path, report_path)
    s3_client.upload_file(report_path, '{}-report'.format(bucket), key)
The handler function assumes that the invoking event will include a series of Records to operate upon. We’ll demonstrate such an event, built as a JSON entity, when we build our function test event later on in the tutorial. We can observe that each record will need to contain a record of the name of the s3 bucket containing the dataset to operate the function on. Also important are the paths to where the source dataset and generated report will be placed. Serverless functions are inherently transitory, so we’ll need to use the /tmp directory of the system Lambda uses to execute your function to store any intermediary data artifacts.
With that out of the way, add the Lambda function code into your deployment package.
zip -g SignalAnalysis.zip SignalAnalysis.py
Deploy your Function Package to Lambda with the AWS CLI tool
aws lambda create-function --function-name SignalAnalysis --runtime python3.7 --handler SignalAnalysis.handler --role arn:aws:iam:xxx:role/lambda-s3-role --zip-file fileb://SignalAnalysis.zip
The AWS CLI tools pack a great deal of power into a single dense tool. Take the opportunity here to understand it better by breaking this call apart.
- aws — invokes the AWS CLI tools
- lambda — specifically invokes the AWS CLI tools for the lambda server
- create-function — Tells Lambda that we are constructing a new Lambda function
- –function-name SignalAnalysis — our function will be named “SignalAnalysis”.
- –runtime python3.7 — our function will utilizing Lambda’s Python 3.7 runtime.
- –handler SignalAnalysis.handler — when invoked, Lambda will call the function called “handler” in SignalAnalysis.py.
- –role arn:aws:iam:xxx:role/lambda-s3-role — the function will be created such that when it is invoked, it is invoked with the role specified. We’ll want to use the role we created in the IAM step of the tutorial
- –zip-file fileb://SignalAnalysis.zip — create the function using the zip-file you’ve specified. The fileb is a necessary part of the file path you pass this argument, and indicates which blob contains the zip file.
If the tool successfully deploys the function to Lambda on your behalf – you will see a JSON response in the command line which will resemble the following:
{
    "TracingConfig": {
        "Mode": "PassThrough"
    },

    "CodeSha256": "PFn4S+er27qk+UuZSTKEQfNKG/XNn7QJs90mJgq6oH8=",
    "FunctionName": "SignalAnalysis",
    "CodeSize": 308,
    "RevisionId": "873282ed-4cd3-4dc8-a069-d0c647e470c6",
    "MemorySize": 128,
    "FunctionArn": "arn:aws:lambda:us-west-2:*********:function:SignalAnalysis",
    "Version": "$LATEST",
    "Role": "arn:aws:iam::123456789012:role/lambda-s3-role",
    "Timeout": 3,
    "LastModified": "2019-08-14T22:26:11.234+0000",
    "Handler": "SignalAnalysis.handler",
    "Runtime": "python3.7",
    "Description": ""
}
In its current state, the function will be configured with default values for settings such as memory usage and the time Lambda gives the function to execute before killing it. As this function can be a little bit compute intensive, the default timeout of 3 seconds will be insufficient. You’ll want to up that timeout to 60 seconds, giving the function enough time to retrieve data, perform calculations, write its report, and upload it back to S3.
To do this with the AWS CLI tools, execute:
aws lambda update-function-configuration --timeout 60
Which will give you a similar response as the previous command if it is successful.
We can continue the rest of this exercise from the AWS Lambda Console, reachable by typing “lambda” into the search bar.
Building a Test Case for your Function
When you arrive at the Lambda dashboard, you’ll see information on the number of Lambda functions you’ve created, metrics related to the functions you’ve been running, in addition to other information. To review and test the function you’ve just created, navigate to your function list by clicking on the “Functions” link on the left hand side of the screen. From the list of functions, click on your unique function name to be taken to that function’s configuration.
From here, we can begin constructing a test event to use to validate that we’ve put together the function correctly.
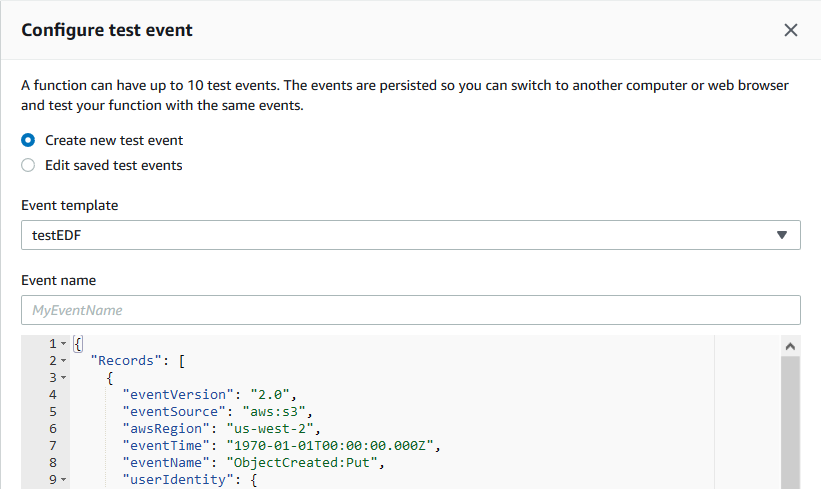
When you click on “Configure Test Events”, you’ll be presented with a pop-up that will, if you do not have any already defined test events, default to “Create new test event”.
Give your event a name similar to the one illustrated above, “testEDF”, and populate the provided JSON editor with the test event provided below – filled out with your unique values where you see lines such as “YOUR BUCKET NAME HERE”.
{
  "Records": [
    {
          "eventVersion": "2.0",
          "eventSource": "aws:s3",
          "awsRegion": "us-west-2",
          "eventTime": "1970-01-01T00:00:00.000Z",
          "eventName": "ObjectCreated:Put",
          "userIdentity": {
                "principalId": "AIDAJDPLRKLG7UEXAMPLE"
          },
          "requestParameters": {
                "sourceIPAddress": "127.0.0.1"
          },
          "responseElements": {
                "x-amz-request-id": "C3D13FE58DE4C810",
                "x-amz-id-2": "FMyUVURIY8/IgAtTv8xRjskZQpcIZ9KG4V5Wp6S7S/JRWeUWerMUE5JgHvANOjpD"
          },
          "s3": {
                "s3SchemaVersion": "1.0",
                "configurationId": "testConfigRule",
                "bucket": {
                      "name": "YOUR BUCKET NAME HERE",
                      "ownerIdentity": {
                            "principalId": "YOUR PRINCIPAL ID HERE"
                      },
                      "arn": "YOUR BUCKET ARN HERE"
                },
                "object": {
                      "key": "ma0844az.edf",
                      "size": 27826914,
                      "eTag": "YOUR ETAG HERE",
                      "versionId": "096fKKXTRTtl3on89fVO.nfljtsv6qko"
                }
          }
    }
  ]
}
Once done – click “Create” to bring it all together. Don’t worry if you’ve made a mistake in the JSON – the editor will let you know, and won’t let you create the event without providing valid JSON.
With that in place, you can finally test your lambda function by clicking the “Test” button next to the name of your test event to submit the test event to the handler of your function.
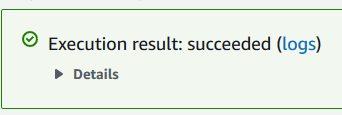
It’ll take awhile, but hopefully the darkened “Executing Function” will eventually be replaced with “Execution result: succeeded”!
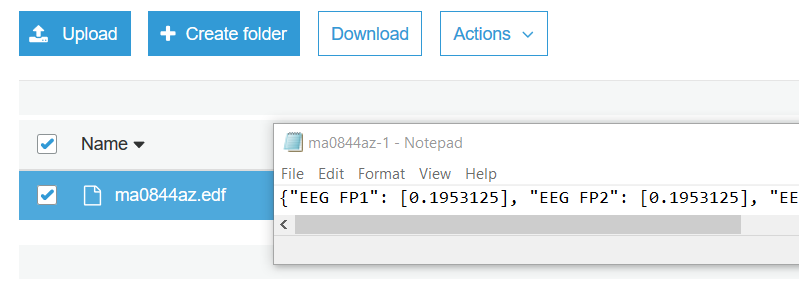
If the function has executed successfully, you should be able to find ma0844az.edf in your report output bucket, which will contain the report results of the executed command.
Troubleshooting
If you don’t see results, or the happy green “Execution Result: succeeded” window, here are a few tips to help you along.
Luckily, any errors you receive regarding the execution of the Python code itself should be presented like a standard stack trace. Use the results to help correct the errors in your function code, and re-upload it to your function. Once the code is updated, just run
zip -g SignalAnalysis.zip SignalAnalysis.py
again, and then update your function code with the AWS CLI by executing:
aws lambda update-function-code fileb://SignalAnalysis.zip
It is important that you have not published your Lambda function – as published Lambda functions are immutable and cannot be updated.
A particularly troublesome and esoteric error I got when writing this article that I want to ensure you don’t end up wasting time on was:
An error occurred (403) when calling the HeadObject operation: Forbidden
What this error means is that the function cannot access, or cannot find, the S3 resource the function was invoked with. Why was this so troublesome in my case? AWS may translate some non-alphanumeric characters into spaces in some cases. In the case of the original file name of the example EDF file, Lambda was seeing it as “ma0844az 1-1 .edf“. Unfortunately, I had to discern this error source through manual testing of the function – as the 403 error one receives includes precious little information on its underlying cause. Once I realized the file name change was occurring however – the error makes sense – as a file that doesn’t exist in an S3 bucket cannot be accessed, hence attempts to do so would be forbidden.
Fin
Congratulations! Hopefully you’ve completed this tutorial, and as a consequence, have gotten some intensive experience under your belt putting together an AWS Lambda function. It doesn’t take much imagination to think of places one could take this function. Perhaps add a secured REST API endpoint at the front to allow customers to submit data to be analyzed, or an engine that uses the report results saved to S3 to generate custom S3 served web reports for customers. I also encourage you to take a step back and consider whether AWS Lambda is the appropriate place to deploy this function – given that it can take up to 60 seconds of run time to complete a run. Will it be cost effective in the long term as compared to other deployment scenarios?
Even if you have a totally different idea, I hope you can see the potential a tool like this could have, and we encourage you to adapt the code for any specific uses you may have in mind. Let us know how the tutorial went for you, and any cool things you build from it in the comments, and good luck with your FaaS explorations!
References
- https://docs.aws.amazon.com/lambda/latest/dg/lambda-python-how-to-create-deployment-package.html
- https://docs.aws.amazon.com/cli/latest/reference/lambda/create-function.html
- https://docs.aws.amazon.com/cli/latest/userguide/cli-chap-configure.html#cli-quick-configuration
- https://docs.aws.amazon.com/lambda/latest/dg/with-s3-example.html
If you’ve got a questions about utilizing FaaS in your business’ use cases – drop us a line at contact@gluearchitectures.com. No matter the complexity, our team of experienced developers will be happy to work with you to analyze, architect, and optimize the solution that’s right for you.


